Have you ever wondered about dyeing your own yarn? You have seen pins and posts about it and wanted to give it a try? I will tell you my experiences about dyeing cotton yarn with my toddler and maybe help shed some light into this colorful project.
If you have done any kind of research about dyeing yarns, you will see that there are plenty of bloggers that will say to stay away from cotton and acrylic yarns as they do not absorb dyes as well as animal fiber yarns such as wool. They are correct and I obviously do not like to listen(hah). I will definitely use wool for next time! I’ll still tell you what methods I used to dye my yarns and hope it gives you a good idea if you wanted to try this out with wool.

Food Coloring Method
Things I used for food coloring yarn:
- White Cotton Worsted Yarn (Tulip Colorlab)
- 3 Large Mason Jars
- Red, Yellow and Blue Gel Food Coloring
- 1/4 cup Vinegar
- Boiling Hot water
- Gloves (Unless you like rainbow fingers)

Step One: Put 1/4 Vinegar into each Mason jar.The Vinegar has acidic compounds which is used to help the yarn absorb the dyes.
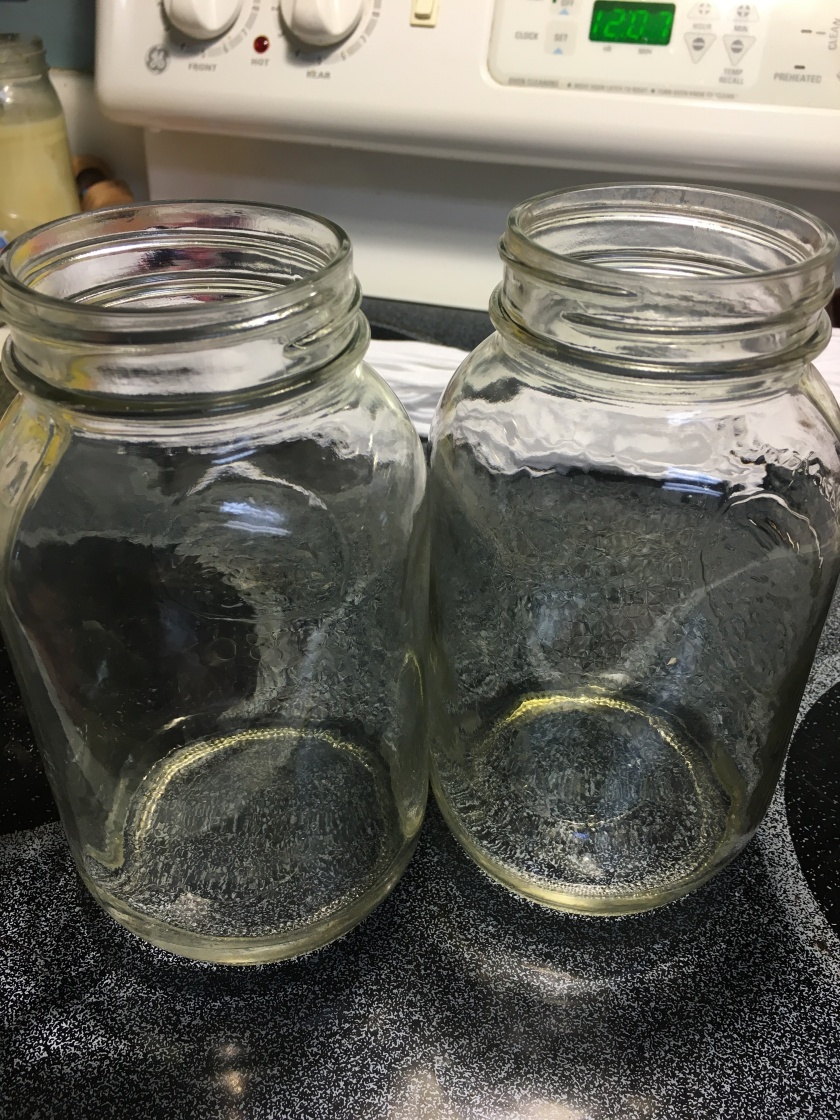
Step Two: Add boiling hot water to each Mason Jar and then add your food coloring. I used gel food coloring and the water needed to be boiling hot to break down the gel and not leave any chunks. Add as much coloring needed for a good solid color. If you wanted to do different colors, you can check out this chart to get the color you want. Food Coloring Color Chart

Step Three: Dip in your yarn in equal amounts into each jar. To get the yarn between the jars to blend, just move the yarn in between the jars back and forth into the dye. Try to be a bit careful when you move them back and forth into the dyes.
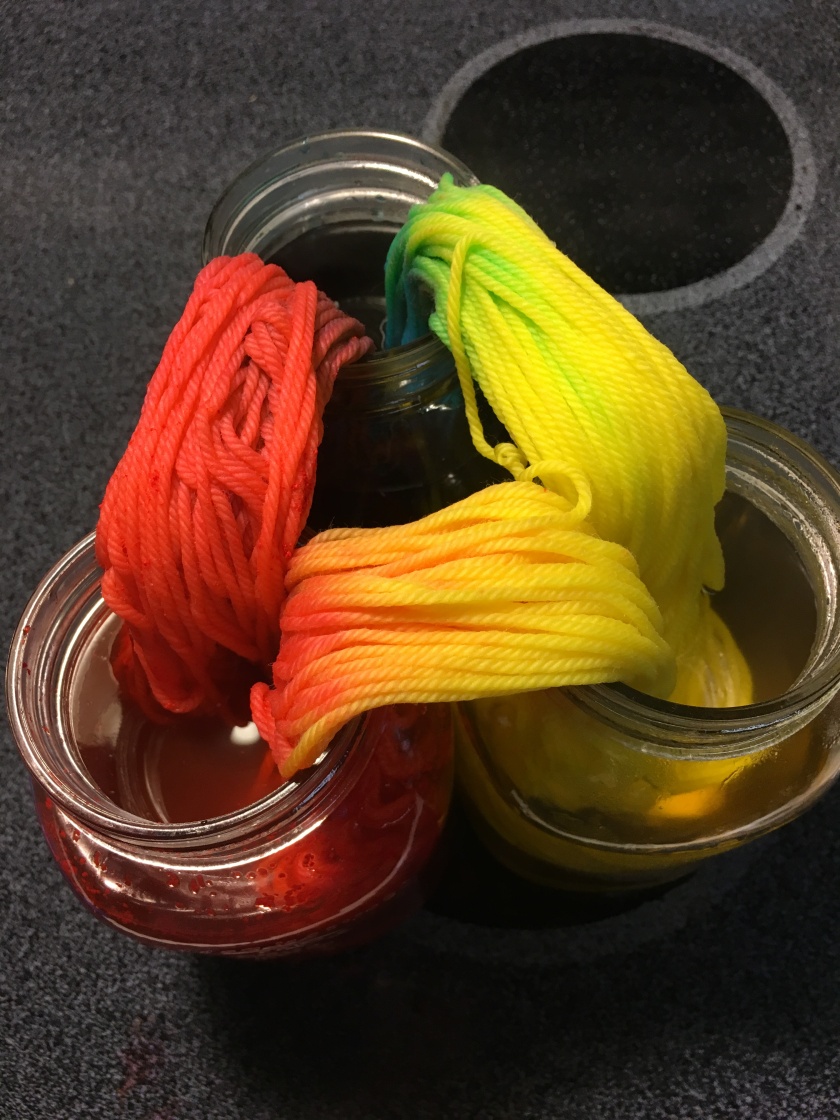
The colors look great so far. I bet it would look even better with wool!
I let the yarn set for 2 hours. I believe they could have set for 30 minutes to and hour and they would be just as good.
Step Four: All you have to do is carefully take these to the sink and pour out the dye one by one. Rinse your yarn with cool water and hang it to dry!
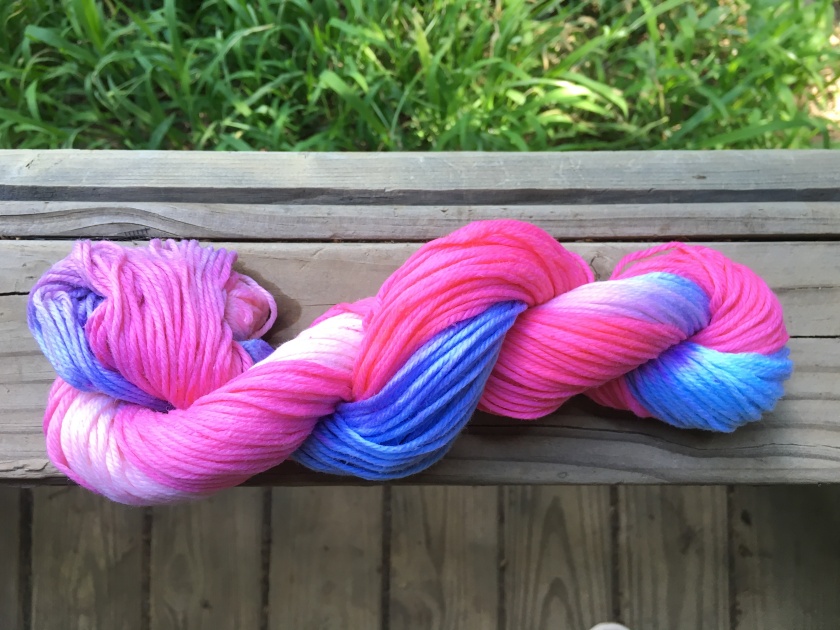
After being washed under the cool water, a lot of my food coloring washed away. My finished product looked nothing like how it did when it was setting in the mason jars. I should not complain too much though. I am growing attached to this cute cotton candy-looking color.
Kool-aid Method
I found this to be super easy and it sounded so good that I even got my sweet Lilly to help me with this one. She is a great little helper! This one was not messy at all.
Here is what you will need for coloring with Kool-aid:
- Cotton Worsted Yarn (Tuliip Colorlab)
- 2 Packs of the same color Kool-aid
- Stove top
- Sauce pan
- Close to Boiling Water
Step One: There are two ways you can do this. You can roll your yarn up into a tight ball like I did for a gradient effect, or you can have the yarn loose and dye it equally all over. 
Step Two: You want to mix your water and kool-aid into the sauce pan and turn it up to medium heat. Once it starts steaming, add your yarn and use a spoon to stir your yarn around to soak in the dye. Keep doing this until your yarn soaks in all the dye into it. You will be able to tell it is ready because the water will be clear. Mine obviously did not do this because it was cotton. Oops!
Step Three: Take out your yarn and rinse it with cold water until the entire ball is cool and soaked. 
Step Four: Mix your second Kool-aid pack and 3 inches of water into the sauce pan. Turn up the heat to medium once more and add your yarn once the mix starts steaming. Make sure to roll your yarn around to coat all sides with the dye. Keep it in the sauce pan for how ever long you feel is necessary. I rolled it around for about 10-15 minutes. 
Step Five: Take your yarn out and rinse it under cold water. Once the yarn cools, you may unwind the ball to form a skein. I unraveled my ball yarn to find that the color was fading into a cool blue color. It looked amazing to me! I was very pleased with the results. I was hoping for a darker, deeper purple, but again.. I was using cotton and not wool like I was supposed to. I am positive wool would have given me much better results.
It came out so pretty even if it was cotton. I’ll be using this yarn for making a teddy for Lilly. It will be extra special because she helped dye the yarn. ❤
Pros and Cons to dyeing cotton yarn:
Pros:
- Fun project for kids and adults
- Inexpensive
- Handmade
Cons:
- Cotton Yarn – Working with this yarn is slightly annoying.
- Cotton Yarn fibers/lint everywhere and itches your nose.
- This type of cotton yarn pills!
- Cotton yarn also tangles very easily.
- Might require a lot of time and patience
Afterthought
This was a great project to do with a toddler. She enjoyed it as much as I did. It was something very new for the both of us. It gave me a great idea what to expect when I want to jump into dyeing with professional dyes and chemicals for different colorization. I will most definitely use wool and animal fiber mixed yarns next time.
I hope this gave you an idea of what dyeing yarn with food coloring and kool-aid could be like and that anyone can do it, even a toddler! Have fun and enjoy! I would love to see and hear about any yarn dyed projects you have done or will do. Just leave a comment!
Thank you!